


Many rescuers are confident with adult AEDs yet hesitate with a small chest. The most common pediatric error is not shock energy, it is pad placement that overlaps or sits too close to the sternum and spine. Consistent training on pediatric pad positioning fixes the highest risk mistakes before the alarm sounds.
The Bigger Picture
Sudden cardiac arrest in infants and children is less common than in adults, but the time pressures are identical. Early high quality CPR and rapid defibrillation are the two interventions that consistently improve survival. Pediatric chests are smaller and more compressible, so pad positioning must preserve a clear current pathway through the heart without pad to pad contact. The right position allows the AED to sense a rhythm accurately and deliver energy efficiently. The wrong position can reduce shock effectiveness or cause the device to advise no shock when one is needed.
Three principles drive pediatric pad placement. First, separation, meaning pads must not touch or overlap. Second, vector, meaning position pads so current travels through the ventricular mass. Third, access, meaning choose a layout that preserves space for compressions and airway management. In practice this means anterolateral placement for most children who have enough chest wall real estate, and anterior posterior placement for infants and any child whose pads might overlap on the front of the chest.
How to Choose the Right Pediatric AED Training Aid
Real performance comes from repetition with accurate visuals and device specific cues. When you select a training aid for pediatric AED pad placement, look for tools that make correct habits automatic across different scenarios and brands.
Age specific diagrams that mirror guidelines
Choose aids that clearly separate infants under 1 year from children 1 to 8 years, and that show both anterolateral and anterior posterior layouts. Correct landmarks matter: upper right chest below the clavicle and left lateral chest below the nipple line for anterolateral, and mid sternum plus mid back between the shoulder blades for anterior posterior.
Brand and pad compatibility cues
Some AEDs use pediatric attenuator pads, others use a pediatric key or setting. The best aids depict brand neutral positions and also note common brand conventions, for example the HeartStart series icons, so teams can cross train without confusion during a multi device response.
Durability and portability
Training materials are handled often. Laminated, wipeable surfaces and compact sizes travel well between classrooms, rigs, and drill sites. Durability supports short, frequent refreshers which drive retention better than a single long class.
Scenario prompts and checklists
Look for quick reference notes on hair removal, wet chest management, medication patches, oxygen safety, and implanted devices. Memory aids that fit on a single panel reduce hesitation in the field.
What the Standards Say
The American Heart Association and the International Liaison Committee on Resuscitation provide the core guidance for pediatric defibrillation. Key points include the following.
- Use pediatric attenuation if available for children 1 to 8 years or under 25 kg, roughly 55 lb. If pediatric pads or settings are not available, use adult pads and ensure they do not touch.
- For infants under 1 year, a manual defibrillator is preferred when trained providers and equipment are immediately available. If only an AED is available, it is reasonable to use it with pediatric attenuation if possible.
- Pad placement should be anterolateral for children when pads fit with at least a small gap between edges. Use anterior posterior when pads risk overlapping on the chest or for infants, where AP typically fits better.
- Avoid placing pads directly over an implanted pacemaker or defibrillator bulge. Offset pads by at least 1 inch. Remove medication patches and wipe the skin dry before pad application.
- Minimize interruptions in chest compressions. Pauses should be under 10 seconds for rhythm analysis and shock delivery.
OSHA guidance on workplace AED programs emphasizes written protocols, responder training, and periodic drills. Your program document should explicitly cover pediatric readiness, including where pediatric supplies are stored, how to switch your AED to pediatric mode if applicable, and which placement you expect for small chests. Always follow your specific device manufacturer instructions since pad size, cable length, and icons differ by model.
Decide your default placement before an event. For most programs, set anterolateral as the default for children, and anterior posterior as the default for infants and for any child with a small chest where pads might touch. Teach crews to switch to the alternative layout immediately if overlap is possible. This single decision tree removes debate and saves seconds.
A Recommended Option
Teams that train with a consistent visual reference make fewer placement errors. A compact, durable guide that shows both infant and child pad positioning can live in an AED cabinet, a training kit, or a first in bag and it supports quick huddles before drills.
The Philips HeartStart AED Infant/Child Pads Placement Guide is built for this purpose. It provides clear, anatomically accurate diagrams for both anterolateral and anterior posterior placement, so instructors can point to exact landmarks while students practice. The laminated format holds up to repeated handling and wipes clean between sessions. It is designed for training and orientation, not for use in a live emergency, which keeps your real pads available for patient care.
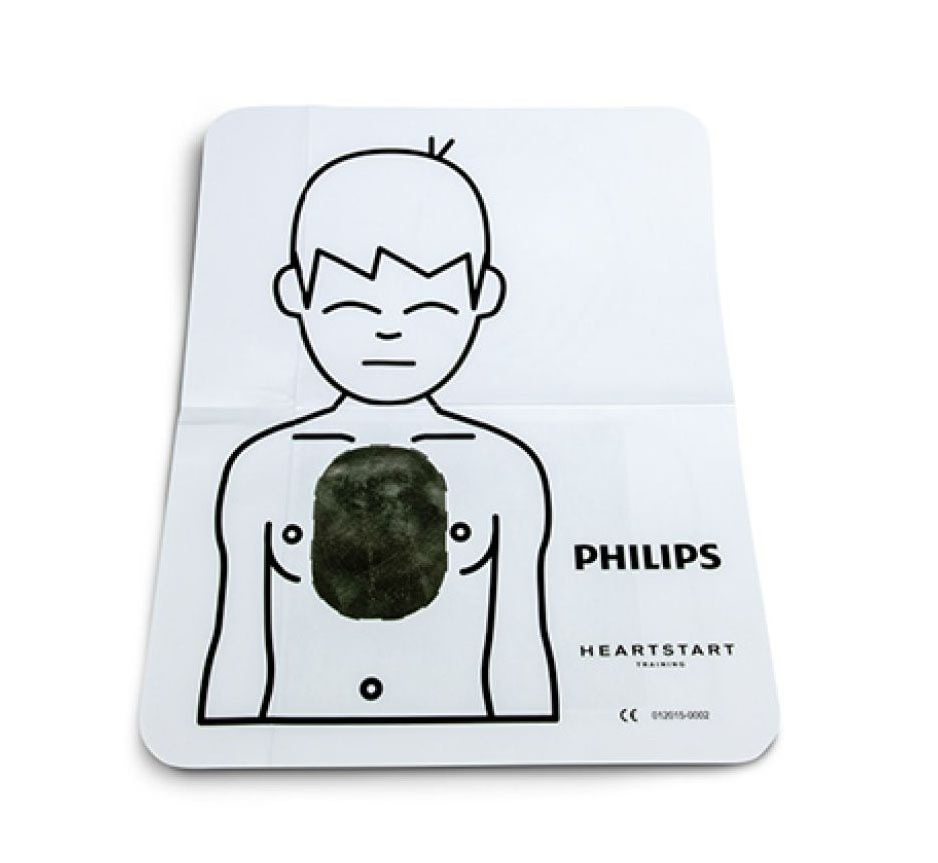
Our Pick: Philips Infant/Child Pad Placement Guide
A durable, portable reference that shows correct infant and child pad positioning and common device cues. Ideal for quick refreshers and skills stations. Training use only.
Mistakes to Avoid
Letting pads touch or overlap on a small chest. If edges approach each other on the front of the chest, switch to anterior posterior immediately. Pad to pad contact can shunt current and confuse rhythm analysis.
Forgetting pediatric attenuation when it is available. Use pediatric pads or a pediatric key for children 1 to 8 years or under 55 lb. If you only have adult pads, use them and verify full separation.
Long pauses while troubleshooting skin prep. Dry quickly, remove medication patches, and manage hair fast. If hair prevents adhesion, press a pad to strip hair, then apply a fresh pad. Keep compression pauses under 10 seconds.
Prepared teams choose a default layout, practice the switch, and reference clear visuals during training. Combine these habits with device specific practice and short, frequent drills. Pediatric events are rare, but mastery of pad placement is a high impact skill that takes minutes to maintain and pays off when seconds count.


